
Monday, July 18, 2011


Monday, July 11, 2011
The Backyard Project

 |
| Backyard the day we closed on our home |
 |
| Side yard the day we closed on our home |

For Easter this year my mom and dad bought the children a play structure. At that point we knew it was time to get to work on the backyard. We had contemplated just cutting out the "grass" in that part of the yard but we really wanted something nice. The existing patio was a 10' x 10' slab of concrete that was only big enough to hold the barbeque and a bistro set. My original idea for the patio was to just extend the concrete with pavers to the hill that holds the sound wall (our property backs up to a freeway, hence the sound wall). We consulted our neighbor who works in landscaping and concrete. He quickly sold us on taking out the small existing slab and pouring a larger concrete patio. That conversation more than doubled our initial budget, YIKES! But we knew we wanted something that we could be proud of and not have to re-do in a few years so we shook hands with him. The first step was to rototill the grass and dirt again and again so new sod could be laid. Then our neighbor and his crew framed out the new 20' x 20' patio and poured the concrete. We decided to go with stamp and two colors which I think makes it look like a million bucks! It did add to the cost but I really think it was worth every. single. penny.

 |
After the concrete was cured and we could walk on it the playset was constructed. Altogether it took two days to build. My husband and his buddy worked on it the first day and he and day completed it the next day. It wasn't that bad really. I would never have paid what the hardware store wanted for them to construct but that's just me. I'm pretty cheap when it comes to certain things. Um, like things I can do myself. =) Next we laid the sod and brought in the bark for the play area. I was kinda nervous about the bark. With Libby having just turned one I didn't know if she would try to eat it, or if it would produce slivers. I had also heard that it can attract termites and cats might do their bidness in it. I did a bit of research online and found a product called Replay made from 100% recycled rubber. The reviews for it were excellent. Supposedly it doesn't lose its color after a few years and it's made mostly from recycled tires. The downside: it's pricey. At almost $8 a bag and 22 bags later we decided a thin layer of it would work for now. We'll add more in a few months.
 |
| Closeup of a piece of "bark" |
 |
| Side yard. We extended the grass further than it was originally |
In those beginning stages of planing our backyard I started looking for new patio furniture. There are so many beautiful sets out there. And they can be EXREMELY expensive. I found a set right away though from Ikea that I just fell in love with. The Applaro Series was gorgeous. I had my heart set on Applaro throughout the whole project. Then I saw this one:

And I knew it would be perfect. It's all weather wicker with a lovely storage table. $300. Three hundred dollars. Seriously. And the cantilever umbrella was $100. I am dead serious. We are planning to put up some sort of permanent arbor at some point, probably in a few years. So the cantilever umbrella works for now. There is sooo much room on the patio too, it's unbelievable!

 | ||||||||
| My Favorite View |
Linked to:





Monday, July 4, 2011
Happy Independence Day!
I want to wish a very happy Independence day to whomsoever may be reading my little bloggie blog. Its the perfect time to remember those who have given their lives for the freedom that we enjoy today. May we never forget their sacrifice or take for granted our freedom and liberties. Happy 4th!
The photo was taken with my droid phone as it is my first attempt with my mobile Blogger app. We'll see how it turns out!
 | |||
| Fruit kabobs. My contribution to our neighborhood festivities. Absolutely no cooking involved :D |
Monday, June 27, 2011
My Inspiration This Month...
I have two projects to be worked on this week/end. I am currently taking an accounting class so hopefully I can get finish as least one by the weeks end. Here is a sneak peak at my inspiration for both of my projects courtesy of Ballard Designs. I heart Ballard. I swoon over Ballard. If Ballard were a person I would marry Ballard :)
Hint #1:
Hint #2:
Do you have any ideas as to what my projects might be???
Hint #1:
 |
Skyler Check Sage Fabric by the Yard from Ballard Designs |
Hint #2:
 |
Garden Seat from Ballard Designs |
Sunday, June 26, 2011
You can't Beat Comfortable
When I pick out furniture I am often torn between comfortable (or practical) and beautiful. Even while I peruse my monthly Elle Decor I often see a picture of a chair or sofa and wonder about how it sits. Is it comfy, stiff, do the owners ever actually USE the furniture? When I bought our sofa 4 years ago a few points were considered. We had a hand me down sectional that we were passing on to another family and I wanted something very different. The sectional was very stiff and contemporary looking. Not my personal style at all. Don't get me wrong, I was very grateful for it, but once we were able to afford buy one of our own, we jumped at the chance. We lived in an apartment at the time and this sectional was waaay too big for it.
 |
| Manufacturers Stock Photo |
 See that cat there on the left? That's Bella. My sweet angel kitty. She LOVES the gold pillow. If she isn't on the arm, she's laying on the chenille pillow. She loves it so much this is what she did to it:
So it was time to do something about the pillow. Or maybe the couch altogether. I made my way over to Bed, Bath and Beyond and was seriously considering a slipcover. I had a slipcovered sofa years ago and really didn't like it. I had made the slipcover myself out of painters dropcloth and the sewing job was horrible. It seemed the slipcover never stayed tucked in and because the fabric was a light color, it stained easily. So I decided against the slipcover. I skipped on over to Joann's (well, I didn't really skip. I drove my truck 2 parking lots over) and ended up in the upholstery fabric section. Right off I found a gorgeous fabric that I loooved. It was a similar color to the existing gold chenille but it had a lovely medallion motif.

And it was on sale. I only needed about 1 1/2 yards but the price was so awesome I bought 2 yards. Seriously awesome price:

Um, yeah. Did you notice the "Regular Price"???

Oh yeah! I will be the first to admit, I am not a sewer. I don't even know if that is the correct term for someone who is proficient with a sewing machine. Whatever that term is, it does not apply to me. At all. Whatsoever. I have a sewing machine. A pretty nice one in my opinion. And I know how to use its basic functions. But that is it. And sewing squares together is about the easiest thing there is, right? So the pillows were not a challege to make.

I sewed the pillows and reused the polyfill from the old pillows.

Whaddaya think? I love the way the pillows turned out. And I got custom fabric that I adore for less than what I would have paid for two ready made pillows at HomeGoods. What could be better?
I'm thinking of eventually either getting a new sofa or slipcovering this one in a solid color. Right now though, solids scare me. I have a 4 (almost 5) year old and a just turned one year old. And paisley hides almost everything! I might give it another year or two =)
Link Parties:


Saturday, March 5, 2011
Guest Bath Mini Makeover
When we bought our house a year and a half ago all of the rooms except the two smaller bedrooms were painted white. I'm pretty sure it was the same white that was originally painted on the house 9 years ago. What is now my sons room was chocolate brown and when a 11' x 11' room is chocolate brown it seems like it's 6' x 6'. My daughters room was Pepto-Bismol pink with a Disney Princess border. We repainted my sons room a pretty grayish blue that reminds me of a stormy day. When we found out baby girl was on her way we painted the pink room a light green color. So every other room in the house was still white. The main living areas and kitchen are all open to each other with 12 foot ceilings so if one is to be painted they all need to be painted. For that reason I have been putting it off. And I still am.
The guest bathroom is small and I was so needing a change to something I decided to tackle that room since there isn't much wall space and the ceiling is a normal 10' height.
It had the 'builders basics'- plate glass mirror, linoleum, shower/bath combo unit and recessed medicine cabinet. I'm not ready to take on a full renovation just yet. Baby girl is so young and I get about 3 hours at a time before she needs her mommy. Not to mention that doing anything over the weekend leaves the regular weekend chores (laundry, grocery shopping, general cleaning of the house) undone. So I was thinking my small project would be easy peasy. I went to Lowe's looking for a faucet. Here is a good time to question the cost of bathroom hardware. Might I just say holy moly! I wasn't expecting a decent faucet to cost so much! Then if you want the matching tissue and towel holders the expense is double. I happened to come upon a great deal. Lowe's was promoting a certain brand and they offered the tissue and towel holder free with the purchase of the faucet. And it happened to be the finish I was looking for so win-win.

(please excuse the mess in the pics - I remembered to take the before pic after I had brought in my tools.)


 The next day I put on the finishing touches- a new light fixture from Ace Hardware, mirror from Target and installed the hand towel ring and tissue holder that I purchased with the faucet from Lowe's. I am very happy with the results. The room is now warm has its own personality. Also, my camera fell off the counter and is b-r-o-k-e-n. Ugh. I still haven't found time to research the current models so I used the camera on my phone for these pics, sorry for the poor quality. Let me know what you think!
The guest bathroom is small and I was so needing a change to something I decided to tackle that room since there isn't much wall space and the ceiling is a normal 10' height.
It had the 'builders basics'- plate glass mirror, linoleum, shower/bath combo unit and recessed medicine cabinet. I'm not ready to take on a full renovation just yet. Baby girl is so young and I get about 3 hours at a time before she needs her mommy. Not to mention that doing anything over the weekend leaves the regular weekend chores (laundry, grocery shopping, general cleaning of the house) undone. So I was thinking my small project would be easy peasy. I went to Lowe's looking for a faucet. Here is a good time to question the cost of bathroom hardware. Might I just say holy moly! I wasn't expecting a decent faucet to cost so much! Then if you want the matching tissue and towel holders the expense is double. I happened to come upon a great deal. Lowe's was promoting a certain brand and they offered the tissue and towel holder free with the purchase of the faucet. And it happened to be the finish I was looking for so win-win.
 |
| Buh-bye to the $10 faucet! |

(please excuse the mess in the pics - I remembered to take the before pic after I had brought in my tools.)
Do you notice the towel bar on the left? That's going to be taken out completely. I had a wonderful vision of a huge piece of beautiful art on that wall. When the project was completed, I went to Target and Home Goods to find something (I'm thinking an abstract floral on canvas) but I couldn't find something that I absolutely loved. So still looking for that special piece. I'll know it when I see it. Another quick note, the horrible strip lighting above the mirror is not shown in the photos because it would blind you. It's one of those lights that has 5 huge bulbs on it reminiscent of an old Hollywood dressing room. It just was not working for me. The first thing I did was install the faucet then I taped off:

Next I removed the plate mirror and although the mirror itself wasn't glued on - thank you Lord- the metal strip attached to the bottom of it that held it onto the wall was:

So out came the sandpaper and spackle. At this point I found myself so happy that ever since I could remember my grandpa was always "working on the house" and taught me a thing or two about repairing walls, hanging wallpaper, installing crown, refinishing wood floors, installing doors where there were none before, etc. There's a glimpse of my prettiful faucet too =)
Next up I took down the shower curtain and painting commenced. Now I want to mention that I did not remove the medicine cabinet. In good design an obvious medicine cabinet (like mine) is abhorrent, but ours is too practical and the bathroom is so small that I left it. Once the kids go to college I will remove it. I would also have loved to install tile floors and replace the bland oak cabinet but it wasn't in our budget this time around. Sooo, after the walls were painted I removed the tape and found this:

Ack! It was completely ruined. The pic is of the wall where it meets the ceiling and the whole room looked like this. I wanted to cry. I tried to straighten the line but the textured walls weren't letting me. I was so upset. I thought of giving up but decided against it. Maybe no one would notice. Maybe it wouldn't completely bug me every time I walked in there. Maybe I would get used to it. Yeah right. I left it for a few hours and that's when I went to Home Goods to look for the art. My hubby called me when I was there. He saw the paint job and it looked really bad. That got me right there. I came home and was absolutely determined to make it look right. After everyone went to bed I got some of baby girls safety swabs and started going around the ceiling with them. It took two hours. Two hours on the ceiling. But it was worth it. It looks so much better. Not perfect but a lot cleaner. I really really want to install moulding. My husband doesn't think I can do it. I've done it before I met him (well, helping my grandpa but that counts, right?) so I figure if I do a small room like the bathroom for practice that will show him how capable I am. He still says I can't do it. Just wait. He'll see =)


Tuesday, January 18, 2011
Before and After
I need to start taking before and after pictures. Seriously. When I'm indulging my other passion of decorating I take so long to think it out. Of course some things are "prettified" much sooner than others, ie. a bookcase compared to the kitchen cabinets, but either way when the project is done and the result is "Wow!", the moment would be better shared with a before and after photo. This would also be a great idea for the hubby when he thinks I've been sitting around all day eating bon-bons. Or writing on my blog. I should take a picture of the house before he leaves for work and another before me and the kid start picking up about 30 minutes before he gets home. Then he shall see that sometimes a girl needs a day or two to sit and eat bon-bons.
Back to the task at hand. My project will be a semi organization of the dreaded garage. Imaginary bass drum: Boom boom boooom!

The reasons for me tackling this are three fold. The first is to get all the small junk off the ground in the garage.


And the third reason (and most important) is to free up some space in my kitchen. I am planning to do one of two things in there; either move canned goods from the pantry to the shelves in the garage or move my very-seldom-used appliances from a lower kitchen cabinet to the garage. If I did the latter I would be able to move my canned goods to the newly freed lower cabinet which would then give me a whole extra shelf to use in my teeny, tiny, little pantry. Considering the temperature gets into the hundreds in the summer I'm thinking I better keep the canned goods in the house. Or would it even matter? Do garbanzo beans go bad if they're in can? Do I really want to find out? Um, no.
So after I dropped the kid off at school and handed the baby to my dear mom, I poured myself a big cup o' joe and headed into the garage. It wasn't as bad as it seemed. Two hours later this is what I had accomplished

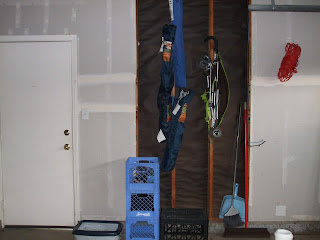
Do you see that I found the opportunity to hang up our folding chairs, the umbrella stroller and the gigantic extension cord? Divine. Next, I cleared the canned goods out of the pantry and moved them to the garage shelves.
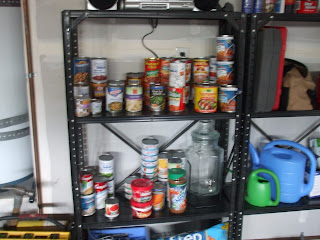
This allowed me to take all of my baby girls food and snacks for the kid and move them to a lower shelf in the pantry so he can get to them himself. I am so brilliant.

I decided to get rid of a few of the seldom used appliances. I hope someone on Craigslist will be searching for a smoothie maker and a 1960's hand mixer. When summer comes I may have reconsider the canned goods being the garage but it works for now.
I'm really liking this before and after thing. And I have something substantial to show hubby when he gets home. Of course he'll probably just say I was writing on my blog all day =)

The reasons for me tackling this are three fold. The first is to get all the small junk off the ground in the garage.


The second is to be able to use the faboosh shelves I got at Goodwill for $30. Yes, three full size shelving units all for thirty dollars. American currency too.

And the third reason (and most important) is to free up some space in my kitchen. I am planning to do one of two things in there; either move canned goods from the pantry to the shelves in the garage or move my very-seldom-used appliances from a lower kitchen cabinet to the garage. If I did the latter I would be able to move my canned goods to the newly freed lower cabinet which would then give me a whole extra shelf to use in my teeny, tiny, little pantry. Considering the temperature gets into the hundreds in the summer I'm thinking I better keep the canned goods in the house. Or would it even matter? Do garbanzo beans go bad if they're in can? Do I really want to find out? Um, no.
So after I dropped the kid off at school and handed the baby to my dear mom, I poured myself a big cup o' joe and headed into the garage. It wasn't as bad as it seemed. Two hours later this is what I had accomplished


Do you see that I found the opportunity to hang up our folding chairs, the umbrella stroller and the gigantic extension cord? Divine. Next, I cleared the canned goods out of the pantry and moved them to the garage shelves.
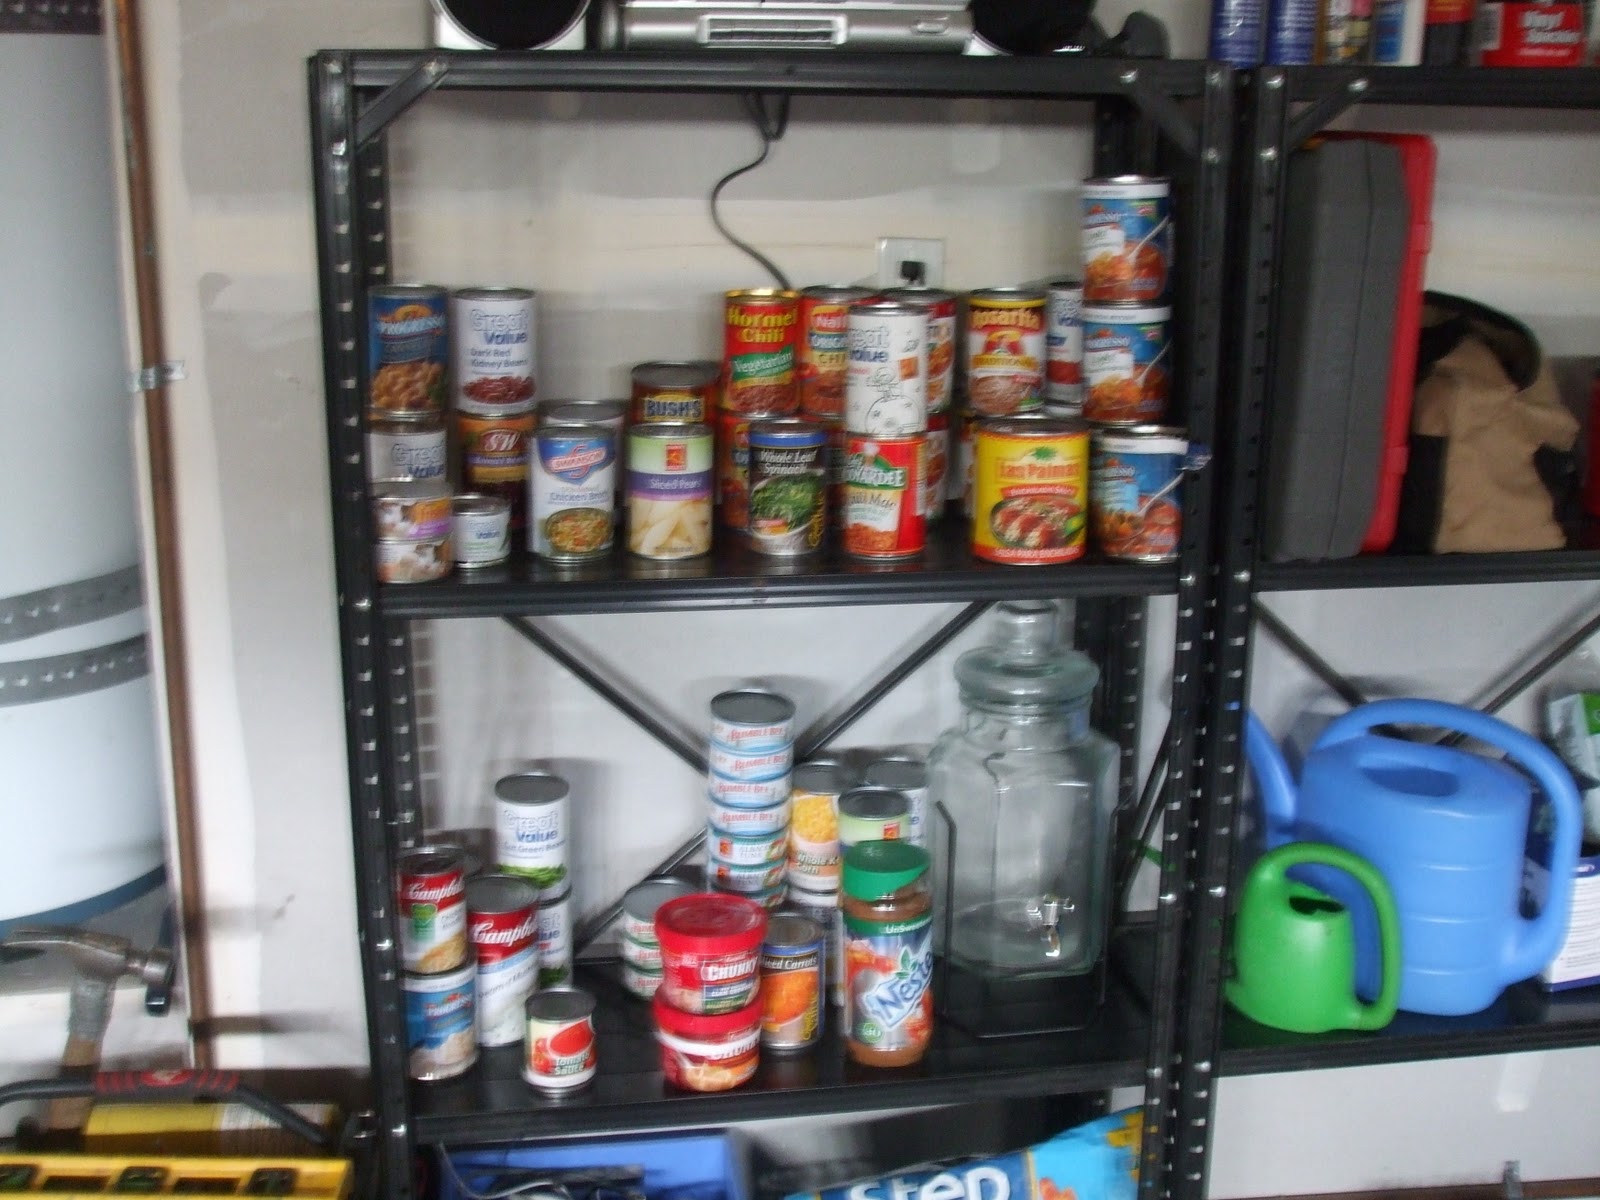
This allowed me to take all of my baby girls food and snacks for the kid and move them to a lower shelf in the pantry so he can get to them himself. I am so brilliant.

I decided to get rid of a few of the seldom used appliances. I hope someone on Craigslist will be searching for a smoothie maker and a 1960's hand mixer. When summer comes I may have reconsider the canned goods being the garage but it works for now.
I'm really liking this before and after thing. And I have something substantial to show hubby when he gets home. Of course he'll probably just say I was writing on my blog all day =)
Subscribe to:
Posts (Atom)